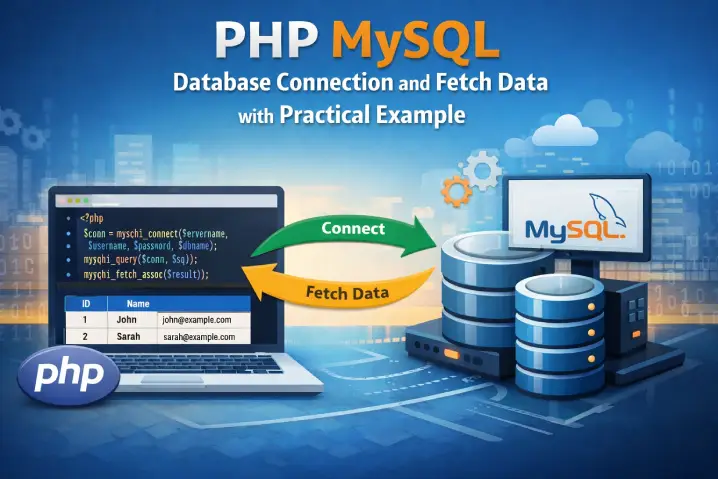
In the previous article, we learned how to work with PHP arrays, conditions, and loops by creating a simple product listing example. However, in real-world applications, product data is usually stored in a database rather than static arrays. In this article, we will connect PHP with a database and store product data in it. We will also learn how to retrieve and display this data dynamically.
Before we begin, make sure you have a local development environment set up on your system. In this tutorial, we will use XAMPP to run PHP and MySQL on our local machine. You should also have basic knowledge of PHP arrays, loops, and conditional statements.
In this tutorial, you will learn:
- How to create a MySQL database
- How to create a table in database
- How to connect PHP with MySQL
- How to insert product data into the database
- How to fetch product data from the database
- How to display the data in a table using PHP loops
1 – How to create a MySQL Database
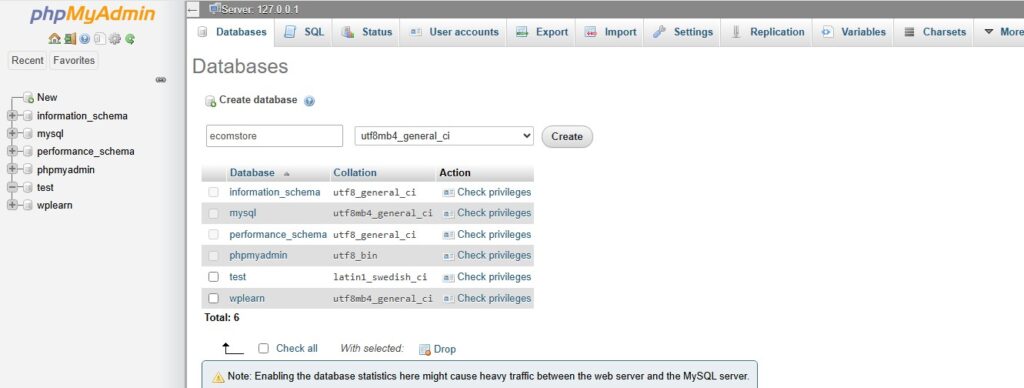
First, we need to create a database to store our product data. Since we are using XAMPP, open phpMyAdmin in your browser and create a new database. I am creating new database with name “ecomstore”.
You can also run the below query to create the database.
CREATE DATABASE ecomstore;2 – How to create a table in database
Once you have finished creating the database, you must create tables to store the data. There are two primary methods for doing this. For instance, the first is a manual approach using the phpMyAdmin graphical interface, which allows you to define structures through a visual menu, as shown in the screenshot below.


Alternatively, you can automate the process by executing below SQL query within your index.php file, which creates the table programmatically when the script is run.
CREATE TABLE products (
    id INT AUTO_INCREMENT PRIMARY KEY,
    name VARCHAR(100),
    price DECIMAL(10,2),
    in_stock BOOLEAN
);
This query creates a new table named products with four specific columns. To begin, here is the breakdown of what each part does:
CREATE TABLE products: Tells the database to reserve space for a new entity named “products”.
id: The name of the column.
INT: It stores whole numbers.
AUTO_INCREMENT: MySQL will automatically assign a new, unique number (1, 2, 3…) every time you add a product.
PRIMARY KEY: This marks the id as the unique identifier for every row, ensuring no two products have the same ID.
name VARCHAR(100): Creates a column for the product name that can hold up to 100 characters. It only uses as much space as the text requires.
price DECIMAL(10,2): Used for exact precision (crucial for money). This number can be up to 10 digits long in total, with 2 digits after the decimal point (e.g., 99.99).
in_stock BOOLEAN: Stores a true/false value (internally in MySQL, this is usually stored as 1 for true and 0 for false).
3 – How to connect PHP with MySQL
To connect PHP with MySQL, create a new file named db-connection.php in your project directory.
<?php
$host = "localhost";
$username = "root";
$password = "";
$database = "ecomstore";

$connection = mysqli_connect( $host, $username, $password, $database );

if( ! $connection ) {
    die( "Database connection failed: " .  mysqli_connect_error() );
}
?>
mysqli_connect() is a built-in PHP function used to establish a connection between PHP script and a MySQL database.
4 – How to insert product data into the database
To insert data into your products table, you will use the MySQL INSERT INTO statement.
INSERT INTO products (name, price, in_stock)
VALUES
('Keyboard', 899.50, 1),
('Mouse', 499.00, 1),
('Monitor', 7999.99, 0),
('Printer', 2499.99, 1),
('Laptop', 27999.49, 1);
This is a SQL (Structured Query Language) query used to add new data to a database. Specifically, it uses the INSERT INTO statement to populate a table named products.
INSERT INTO products (name, price, in_stock): This tells the database you want to add new rows to the “products” table. The names in the parentheses specify which columns you are filling.
VALUES: This keyword introduces the actual data being inserted. In short, it will insert 5 new records into ‘products’ table.
5 – How to fetch product data from the database
To fetch data from your products table, you use the SQL SELECT statement.
In order to fetch all records:
SELECT * FROM products;To fetch specific columns:
SELECT name, price FROM products;To fetch data using WHERE condition:
SELECT * FROM products WHERE in_stock = TRUE;This is a SQL filter (WHERE clause) used to narrow down your results.
Instead of showing every item in your inventory, it tells the database: Only give me the rows where the item is currently available.
To fetch data with ORDER BY:
SELECT * FROM products ORDER BY price ASC;This is a SQL sorting (ORDER BY clause) query used to organize the list. It tells the database: Show me all products, but list them starting with the lowest price.
6 – How to display the data in a table using PHP loops
To display the fetched product data, you usually output it inside HTML so it looks clean on the webpage.
<?php
$sql = "SELECT * FROM products";
$result = mysqli_query($conn, $sql);

if (mysqli_num_rows($result) > 0) {

    echo "<table border='1' cellpadding='10' cellspacing='0'>";
    echo "<tr>
            <th>ID</th>
            <th>Name</th>
            <th>Price (₹)</th>
            <th>In Stock</th>
          </tr>";

    while ($row = mysqli_fetch_assoc($result)) {

        echo "<tr>";
        echo "<td>" . $row["id"] . "</td>";
        echo "<td>" . $row["name"] . "</td>";
        echo "<td>" . $row["price"] . "</td>";
        echo "<td>" . ($row["in_stock"] ? "Yes" : "No") . "</td>";
        echo "</tr>";
    }

    echo "</table>";

} else {
    echo "No products found.";
}
?>
This is a PHP script that retrieves all the data from your products table and displays it in a clean, formatted HTML table.
SELECT *: It tells the database to Select everything from the products table.
mysqli_query($conn, $sql): This executes the command using your database connection.
mysqli_num_rows($result) > 0: This will check if there are actually any products to show. If not, it simply says No products found.
Conclusion
In this tutorial, you learned how to create a database table, insert sample data, and fetch those records using SQL queries. As a result, you now understand the complete flow — from database creation to displaying the data on a webpage. Overall, this simple example gives you a strong foundation for working with PHP and MySQL in real-world projects.
If you like this article, then you can write your words in the comments section. Or if you want to know more about PHP & MySQL then don’t hesitate to reach out us. Not least but last, you can also follow us on X.com.